
Guide to Light Reflectors in Film

Lighting plays a crucial role in filmmaking, shaping the mood and atmosphere of a scene while highlighting key aspects of the story. In this comprehensive guide, we will explore the world of light reflectors and their invaluable role in controlling and manipulating light. By the end of this guide, you'll have the knowledge and confidence to experiment with various reflectors to achieve stunning cinematic visuals.
A well-lit scene can make all the difference in capturing the desired mood and tone of a film. Light reflectors are versatile and essential tools for cinematographers, enabling them to manipulate and control light in a variety of ways. In this guide, we will cover different types of light reflectors, their uses, and techniques for achieving the perfect shot. Let's dive in!
Types of Light Reflectors
Light reflectors come in various shapes and sizes, each with its own advantages and disadvantages. Below, we'll discuss the four main types of light reflectors used in filmmaking.
Flat Reflectors
Description: Flat reflectors are simple, two-dimensional panels that bounce light in a single direction. They are typically made of lightweight materials, making them easy to transport and set up.
Advantages and Disadvantages: Flat reflectors provide even and consistent bounce lighting, making them ideal for filling in shadows and adding soft illumination. However, their simplicity may limit their versatility in more complex lighting setups.
Common Materials: Foam core, beadboard, and collapsible fabric panels are popular materials for flat reflectors due to their lightweight nature and ability to evenly bounce light.
Convex Reflectors
Description: Convex reflectors have a curved surface that protrudes outward, scattering light in multiple directions. This design allows for a wider spread of light compared to flat reflectors.
Advantages and Disadvantages: Convex reflectors can provide broader illumination and are useful for creating a soft, wrap-around lighting effect. However, their dispersed light may be harder to control and require additional diffusion or flagging to achieve the desired effect.
Common Materials: Convex reflectors are commonly made of reflective fabric stretched over a curved frame or molded plastic with a mirrored surface.
Concave Reflectors
Description: Concave reflectors have an inward-curving surface that focuses light into a more concentrated beam. This design allows for greater control over the direction and intensity of the reflected light.
Advantages and Disadvantages: Concave reflectors are useful for creating spotlight effects, highlighting specific areas of a scene, or providing intense fill light. However, their focused light may create harsh shadows and require diffusion to soften the effect.
Common Materials: Like convex reflectors, concave reflectors are often made of reflective fabric stretched over a curved frame or molded plastic with a mirrored surface.
Cylindrical Reflectors
Description: Cylindrical reflectors have a tube-like shape that combines the benefits of both convex and concave reflectors. Their unique design provides both focused and dispersed light, making them versatile tools for various lighting scenarios.
Advantages and Disadvantages: Cylindrical reflectors offer a balance of focused and soft light, making them suitable for a range of applications, from subtle fill light to more dramatic effects. However, their larger size and bulk may make them less portable and more challenging to position.
Common Materials: Cylindrical reflectors are typically made of reflective fabric or plastic materials wrapped around a cylindrical frame.
Reflective Surfaces and Colors
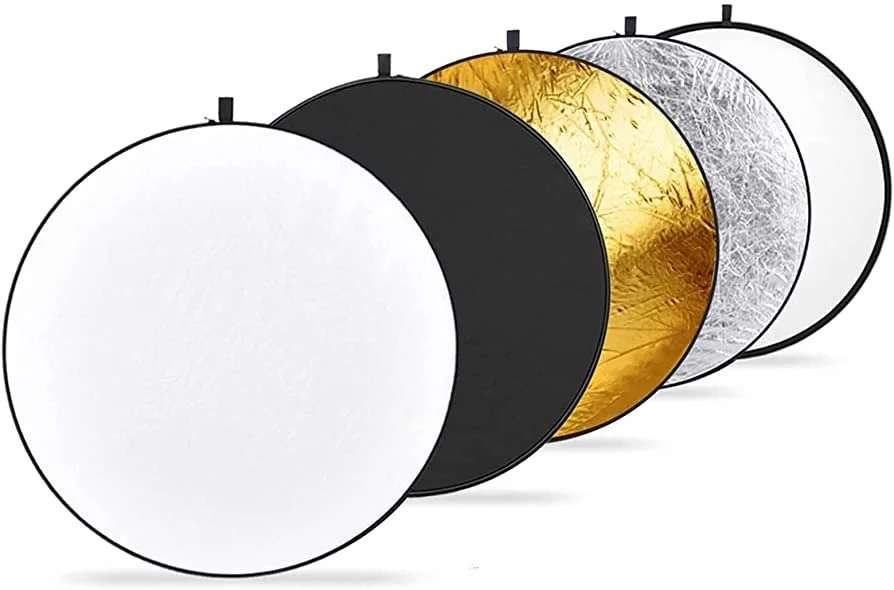
The color and material of a reflector's surface can have a significant impact on the quality and tone of the reflected light. Let's explore the characteristics and use cases of four common reflective surface colors.
Silver Reflectors
Characteristics: Silver reflectors produce a bright, high-contrast light with a slightly cool color temperature. They maintain most of the light's original intensity, resulting in a more specular reflection.
Use Cases: Silver reflectors are ideal for situations where you need to add a significant amount of fill light, emphasize textures, or create a more dramatic lighting effect. They can also be useful for outdoor shoots, as they effectively bounce sunlight to fill in shadows and create a balanced exposure.
White Reflectors
Characteristics: White reflectors provide a softer, more diffused light with a neutral color temperature. They reduce the intensity of the reflected light, resulting in a more subtle fill effect.
Use Cases: White reflectors are excellent for adding gentle fill light without dramatically altering the scene's overall contrast or color balance. They are particularly useful for portrait lighting, as they create a flattering, even illumination on the subject's face.
Gold Reflectors
Characteristics: Gold reflectors produce a warm, golden-toned light that can mimic the appearance of sunlight during the golden hour. They maintain a moderate level of light intensity while adding warmth to the scene.
Use Cases: Gold reflectors are well-suited for outdoor shoots or scenes where you want to enhance the warm, natural light quality. They can also be used to add a touch of warmth to skin tones, making them a popular choice for portrait photography and close-up shots.
Black Reflectors (Flags)
Characteristics: Black reflectors, also known as flags, absorb light rather than reflecting it. They can be used to create negative fill, adding shadows and depth to a scene.
Use Cases: Black reflectors are perfect for controlling light spill and creating a more dramatic contrast in a scene. They are particularly useful in situations where you want to emphasize the shape and contours of an object or subject, or when you need to prevent unwanted light from reflecting onto your subject.
Techniques for Using Light Reflectors
Now that we've covered the different types of reflectors and their characteristics, let's explore some common techniques for using them effectively on set.
Bounce Lighting
Definition: Bounce lighting involves reflecting light off a surface, such as a reflector or wall, to create a soft, indirect illumination.
Tips for Effective Use:
Experiment with different angles to find the ideal direction and intensity of the bounced light.
Use a larger reflector or move it closer to the subject for a softer light quality.
Combine different reflector colors and materials to achieve the desired color temperature and intensity.
Negative Fill
Definition: Negative fill involves using a black reflector (flag) to absorb light, creating shadows and adding depth to a scene.
Tips for Effective Use:
Position the black reflector close to the subject to create deeper, more pronounced shadows.
Use multiple flags to control light spill and shape the light around your subject.
Experiment with different sizes and shapes of flags to achieve the desired shadow effect.
Diffusion
Definition: Diffusion involves placing a translucent material, such as a diffusion panel or fabric, between the light source and the subject to soften and spread the light.
Tips for Effective Use:
Move the diffusion material closer to the light source for a softer effect.
Experiment with different thicknesses and materials to find the ideal level of diffusion.
Combine diffusion with bounce lighting to create a multi-layered, complex lighting setup.
Creating Contrast
Definition: Creating contrast involves using a combination of light and shadow to emphasize specific elements in a scene and add depth to the overall image.
Tips for Effective Use:
Experiment with the position and intensity of your key light, fill light, and backlight to create a dynamic interplay of light and shadow.
Utilize negative fill to deepen shadows and accentuate the contours of your subject.
Balance the use of different reflector colors and materials to create a harmonious contrast between warm and cool tones or between soft and hard light.
Choosing the Right Reflector for Your Project
Selecting the appropriate reflector for your film project depends on various factors, such as your budget, scene requirements, portability, and durability. Here are some recommendations based on different scenarios:
Low Budget: Flat reflectors made of foam core or beadboard are affordable and versatile options for filmmakers on a tight budget. They provide even bounce lighting and can be easily customized to suit your needs.
Outdoor Shoots: For outdoor scenes, consider using silver or gold reflectors to effectively bounce sunlight and create a balanced exposure. Silver reflectors work well in bright sunlight, while gold reflectors can add a warm, golden hour look to your scene.
Portrait Lighting: White reflectors are ideal for portrait lighting, as they create a soft, flattering illumination on the subject's face. Combine white reflectors with diffusion panels or fabric for even softer, more diffused light.
Dramatic Lighting Effects: To achieve more dramatic lighting effects, consider using concave or cylindrical reflectors to focus light and create intense highlights. Combine these with black flags to shape the light and add depth through shadows.
Conclusion
Light reflectors are indispensable tools for filmmakers, offering a wide range of possibilities for manipulating and controlling light in a scene. By understanding the different types of reflectors, their characteristics, and the techniques for using them effectively, you can create stunning cinematic visuals that tell your story with precision and flair. Don't be afraid to experiment with various reflectors and lighting setups to find the perfect combination for your project. Happy shooting!